Editing pages
Using the Editor, you can edit content directly on the page. As you hover over an editable element, a pencil or picture icon will appear to the upper right. To edit the element, simply click the icon.
Note: Some styling and custom code will not show as they should appear on the published site. That is normal behavior within the Editor.
Editing text content
Edit pencil
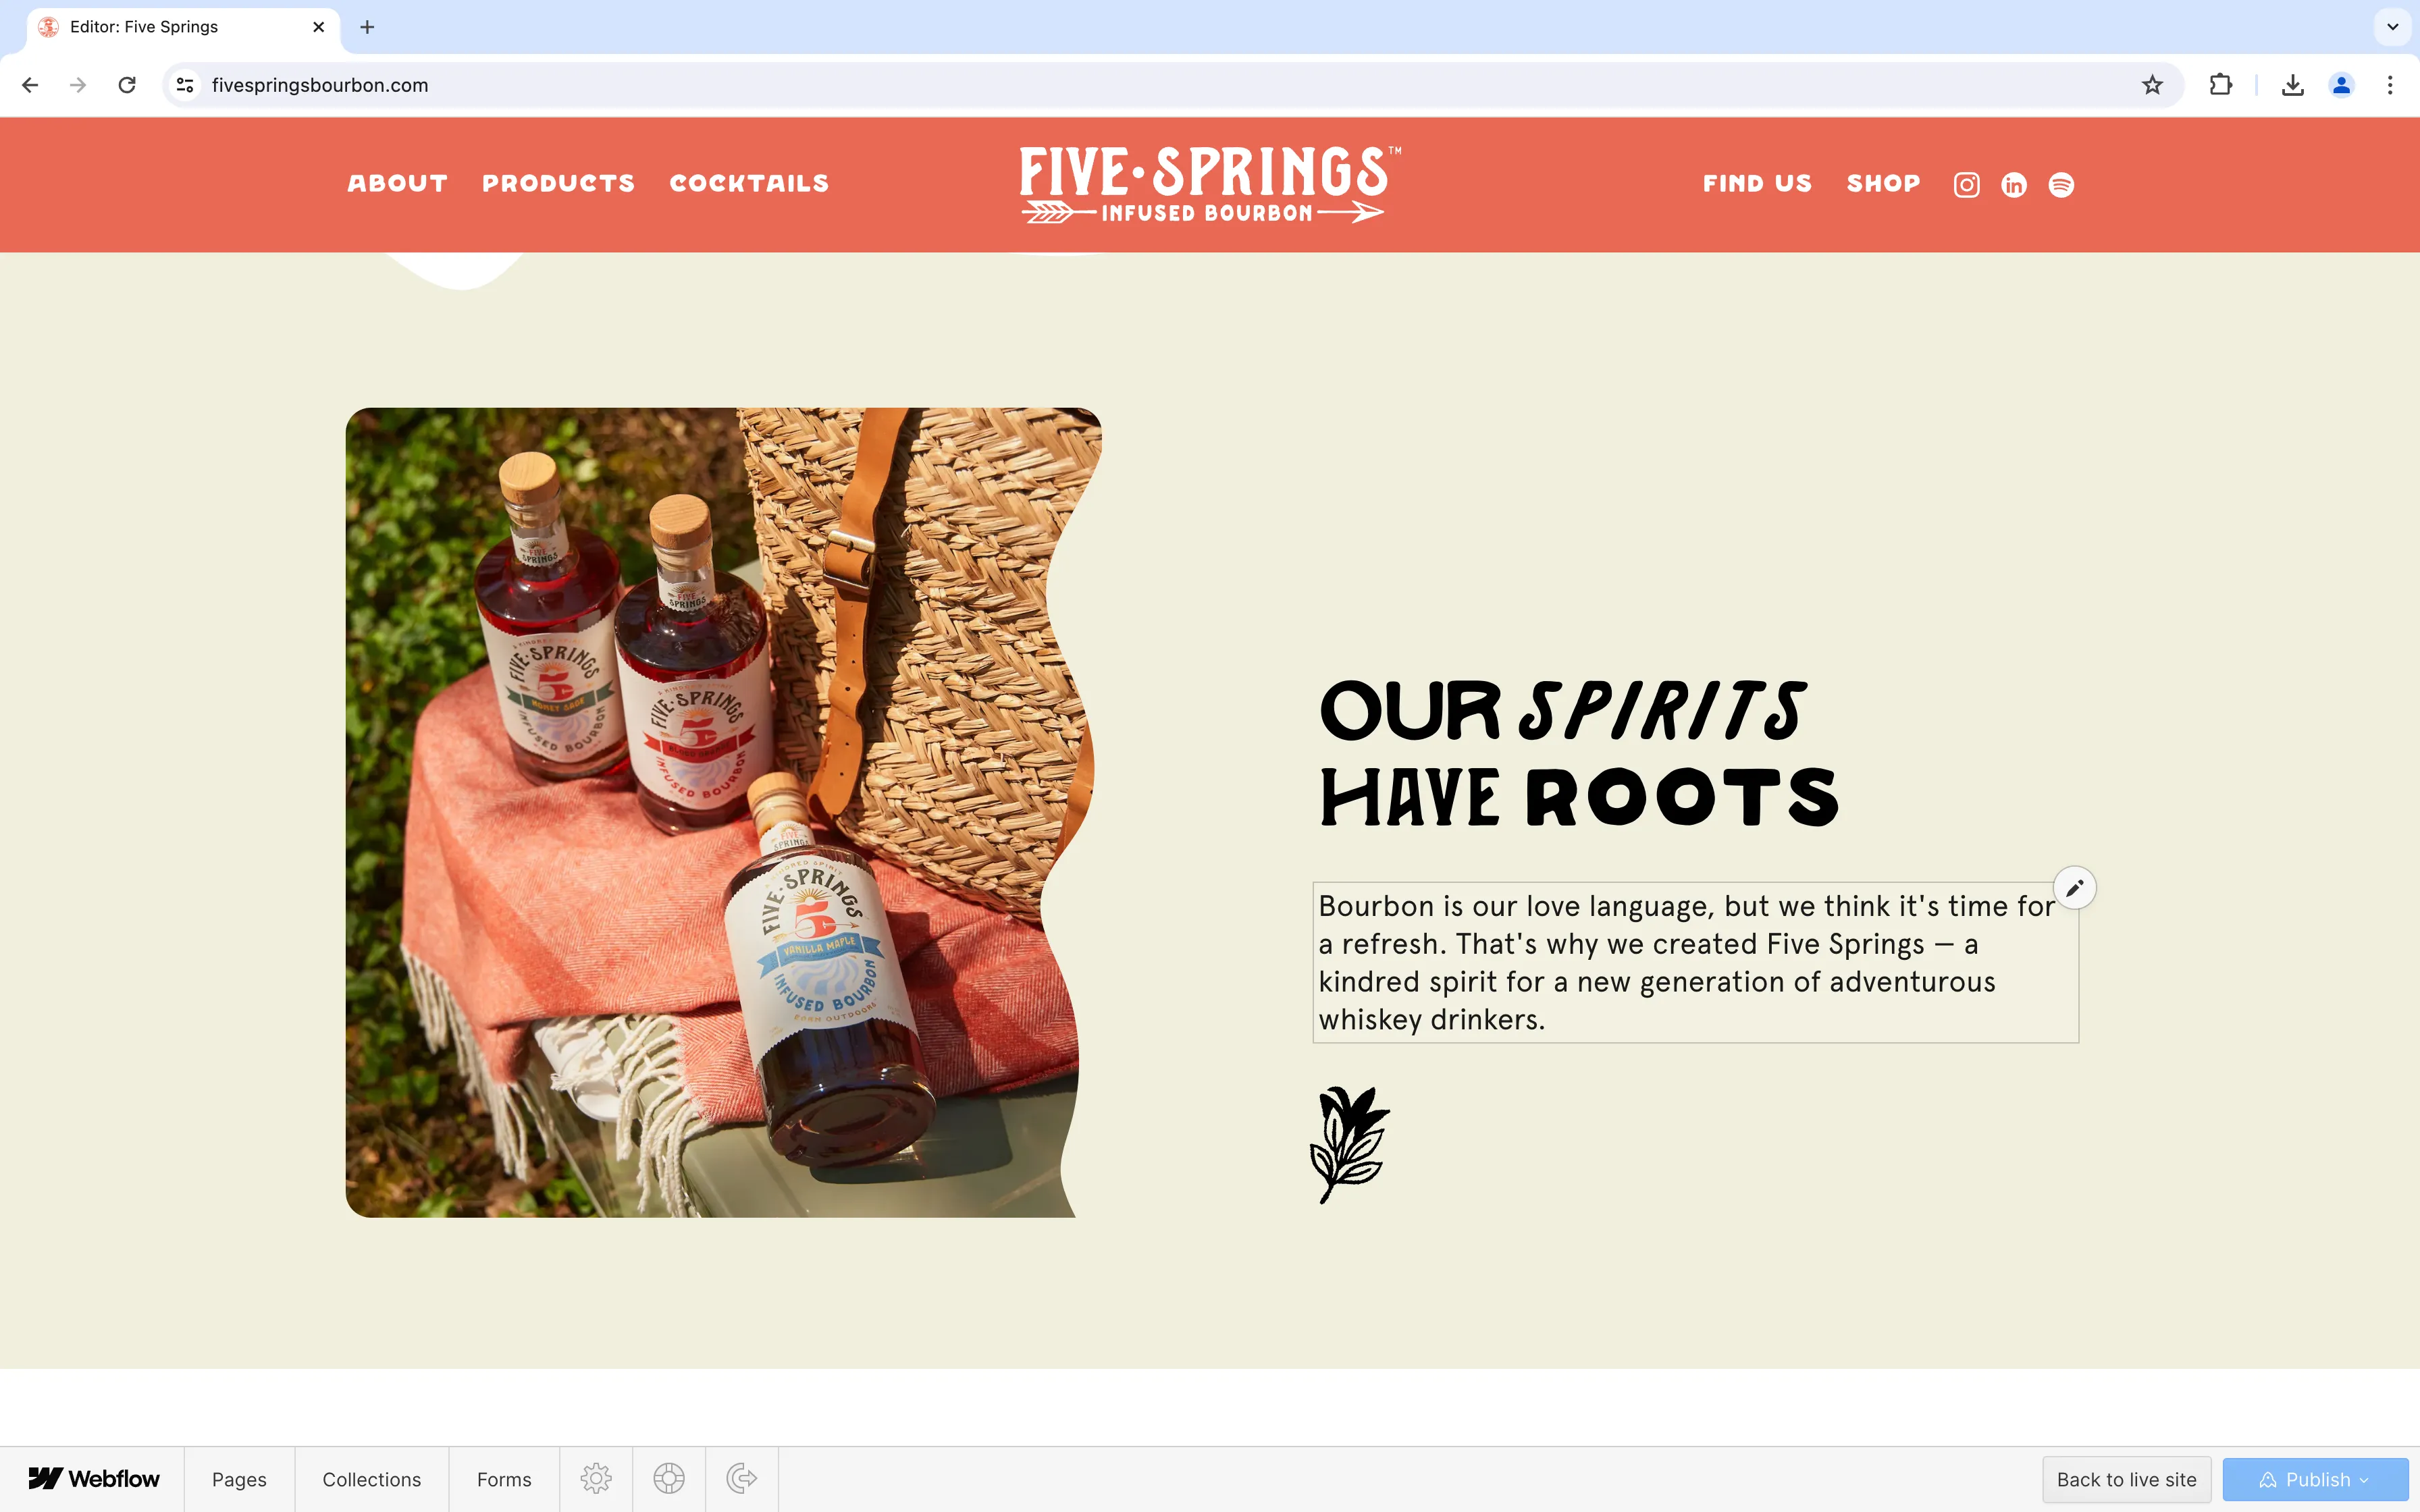
When hovering over editable text elements, you’ll see a light-gray outline around the text element and a pencil icon in the upper right. Click the icon or click inside the box to edit text.
Editing selected text
In addition to rewriting text, you can add formatting. To do so, highlight text and select from the floating toolbar that appears.
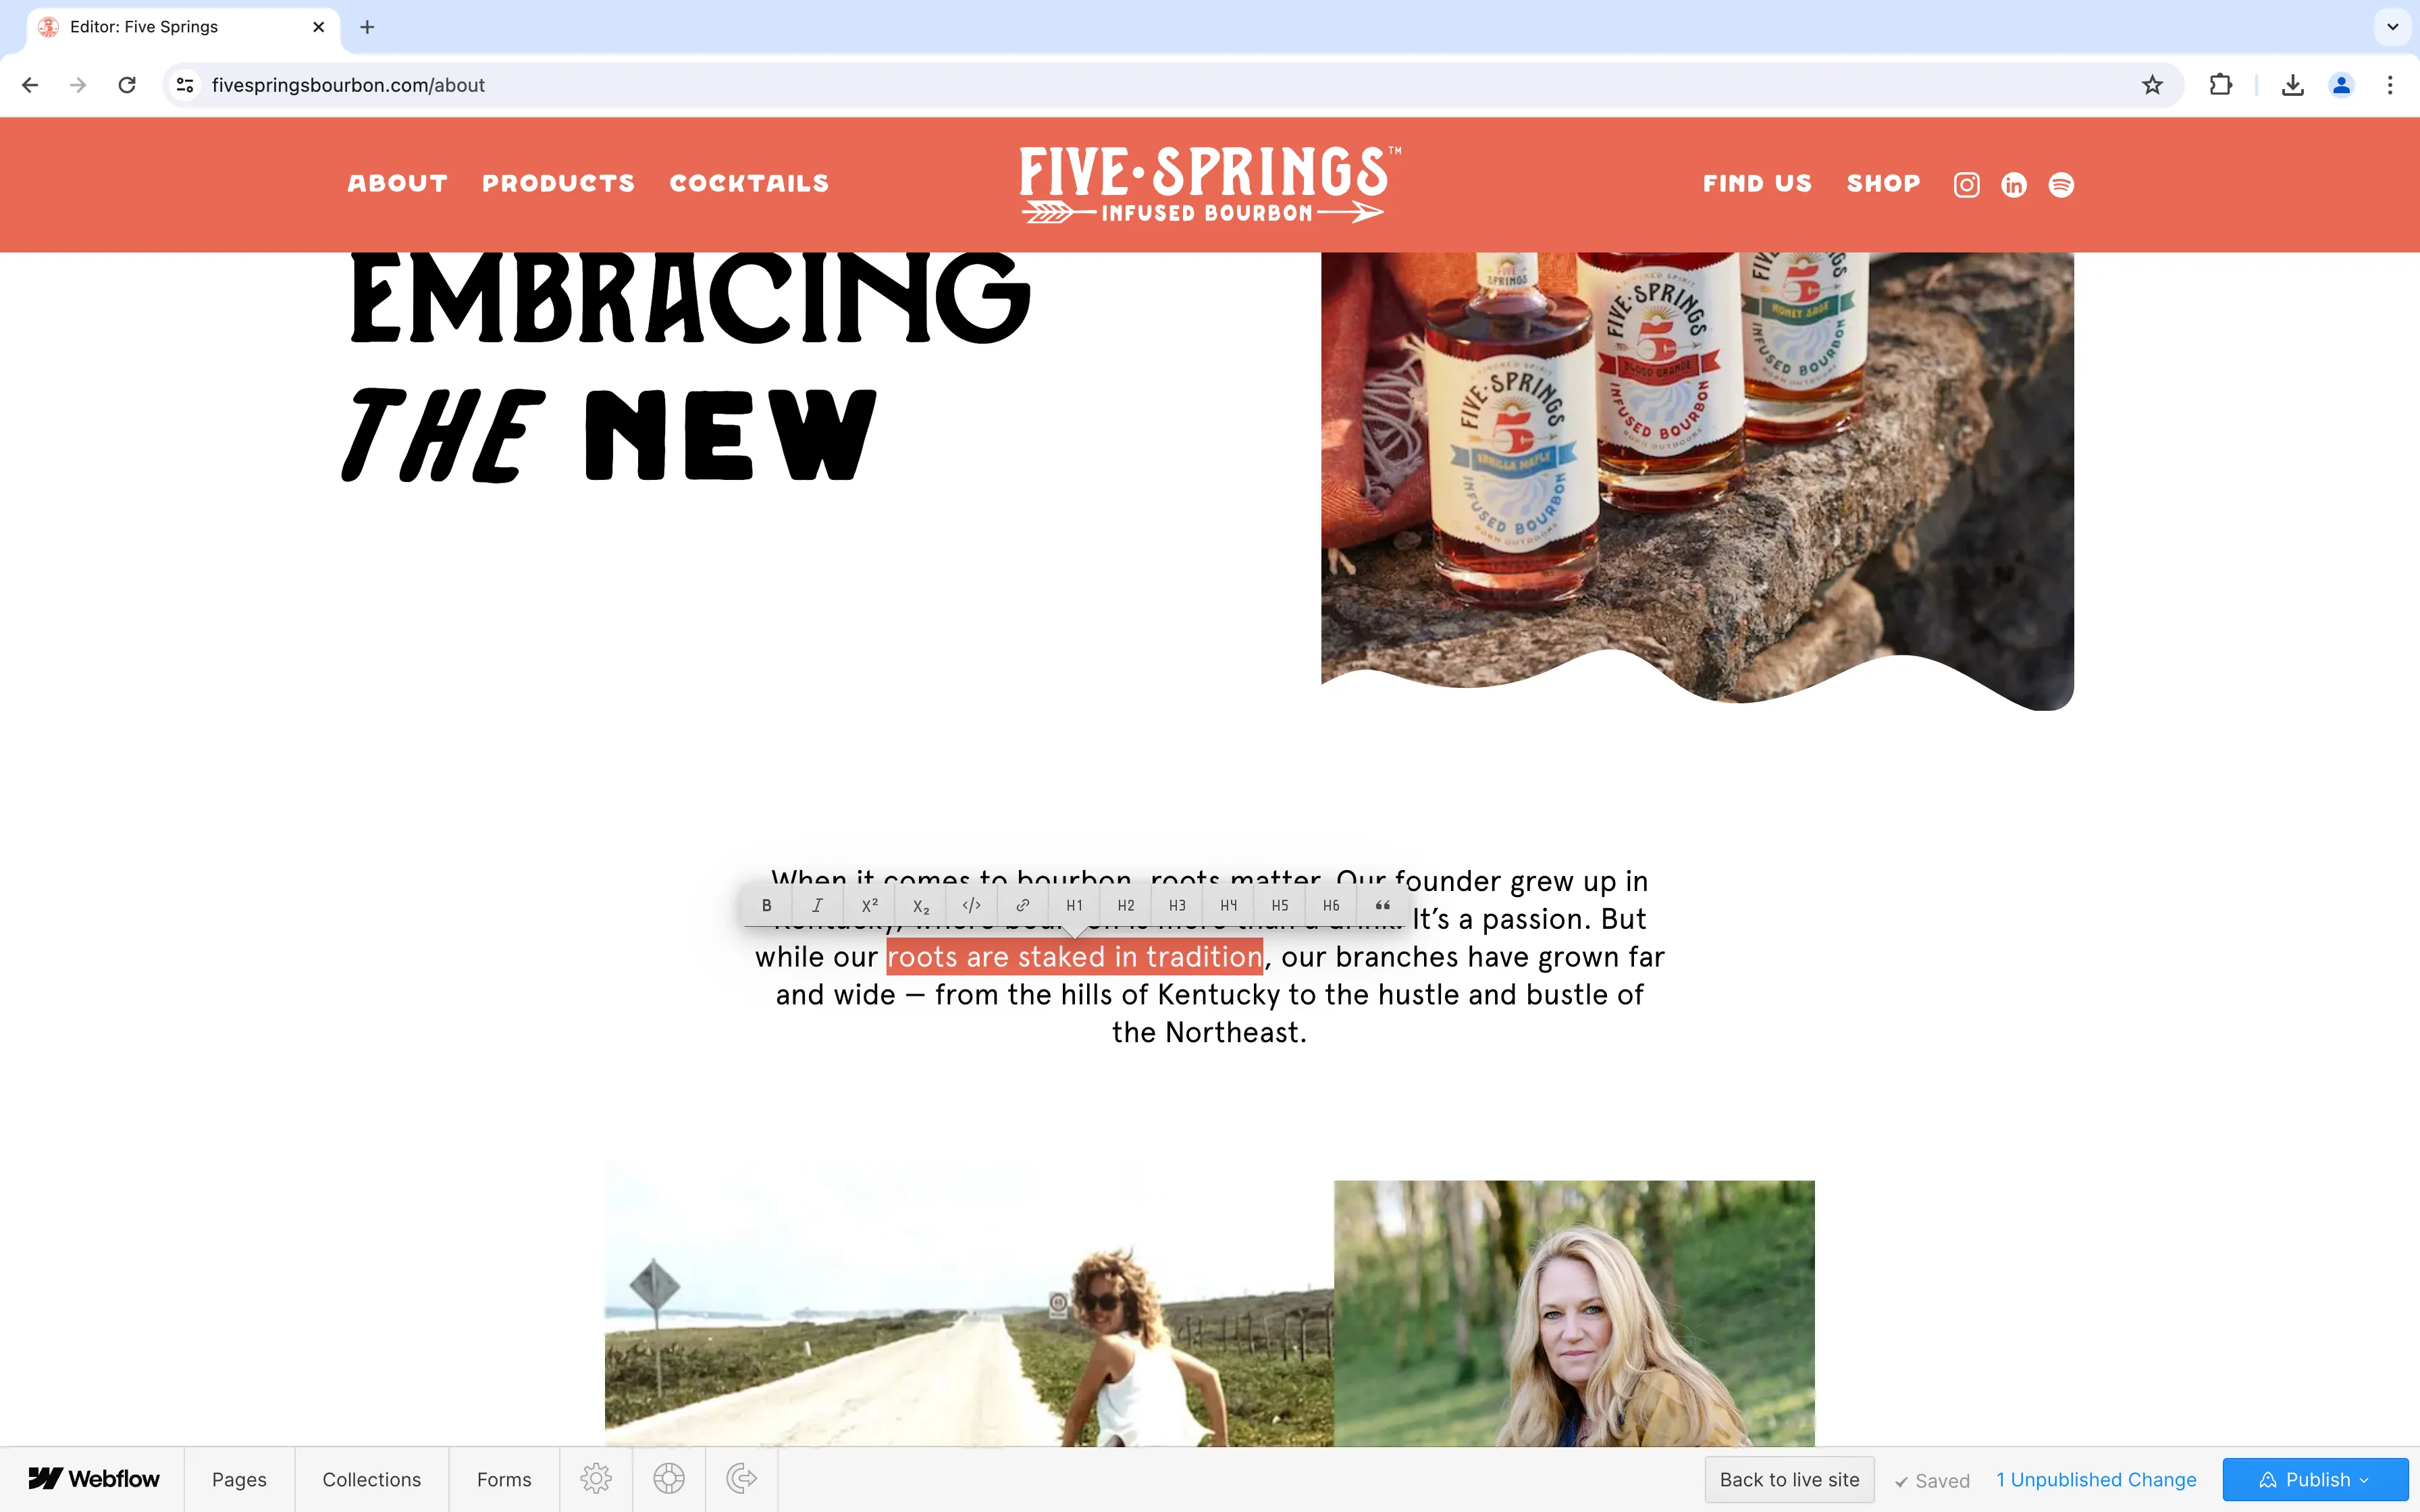
The following options are available in the formatting toolbar:
- Bold
- Italic
- Superscript
- Subscript
- Monospaced
- Link
- Heading (levels one through five)
- Blockquote
Rich text elements
Rich text elements provide more capability than plain text. You can add photos or videos, embed scripts, create lists, and more. To determine if you are editing a rich text element, hit Enter on your keyboard to create a new line. If you are in a rich text element, a button will appear to the left of the new line.

Click the button to pick from a list of formatting options.

Using the floating toolbar, choose from the following additions:
- Image
- Video
- Custom code (to run on page)
- Rich content embed
- Code block (to display on page)
- Ordered (numbered) list
- Unordered (bulleted) list
Rich text elements are only available in certain sections of the site. If you have questions about options or availability, please reach out to Bullhorn.
Images
To replace an image, hover over it with your cursor and click the picture icon. This will open a file explorer you can use to upload an image from your computer.
![]()
Note: Any visual styles created for an element in the Designer, such as a color overlay, border color, or shadow, will automatically apply to any image or background image you replace through the Editor.
Static vs dynamic content
When editing page content, you may notice that some content boxes are different than others. Static content — content that is not managed by a collection — can be edited using the methods above. Dynamic content cannot be edited on the page.
When you hover over dynamic content, you will see a purple tooltip that says:
“The content of this element is synced between multiple elements.”
In other words, this content is managed in a central location, and that data is synced to all the elements that request it. Therefore, dynamic content must be managed in the collection entry that holds that data.
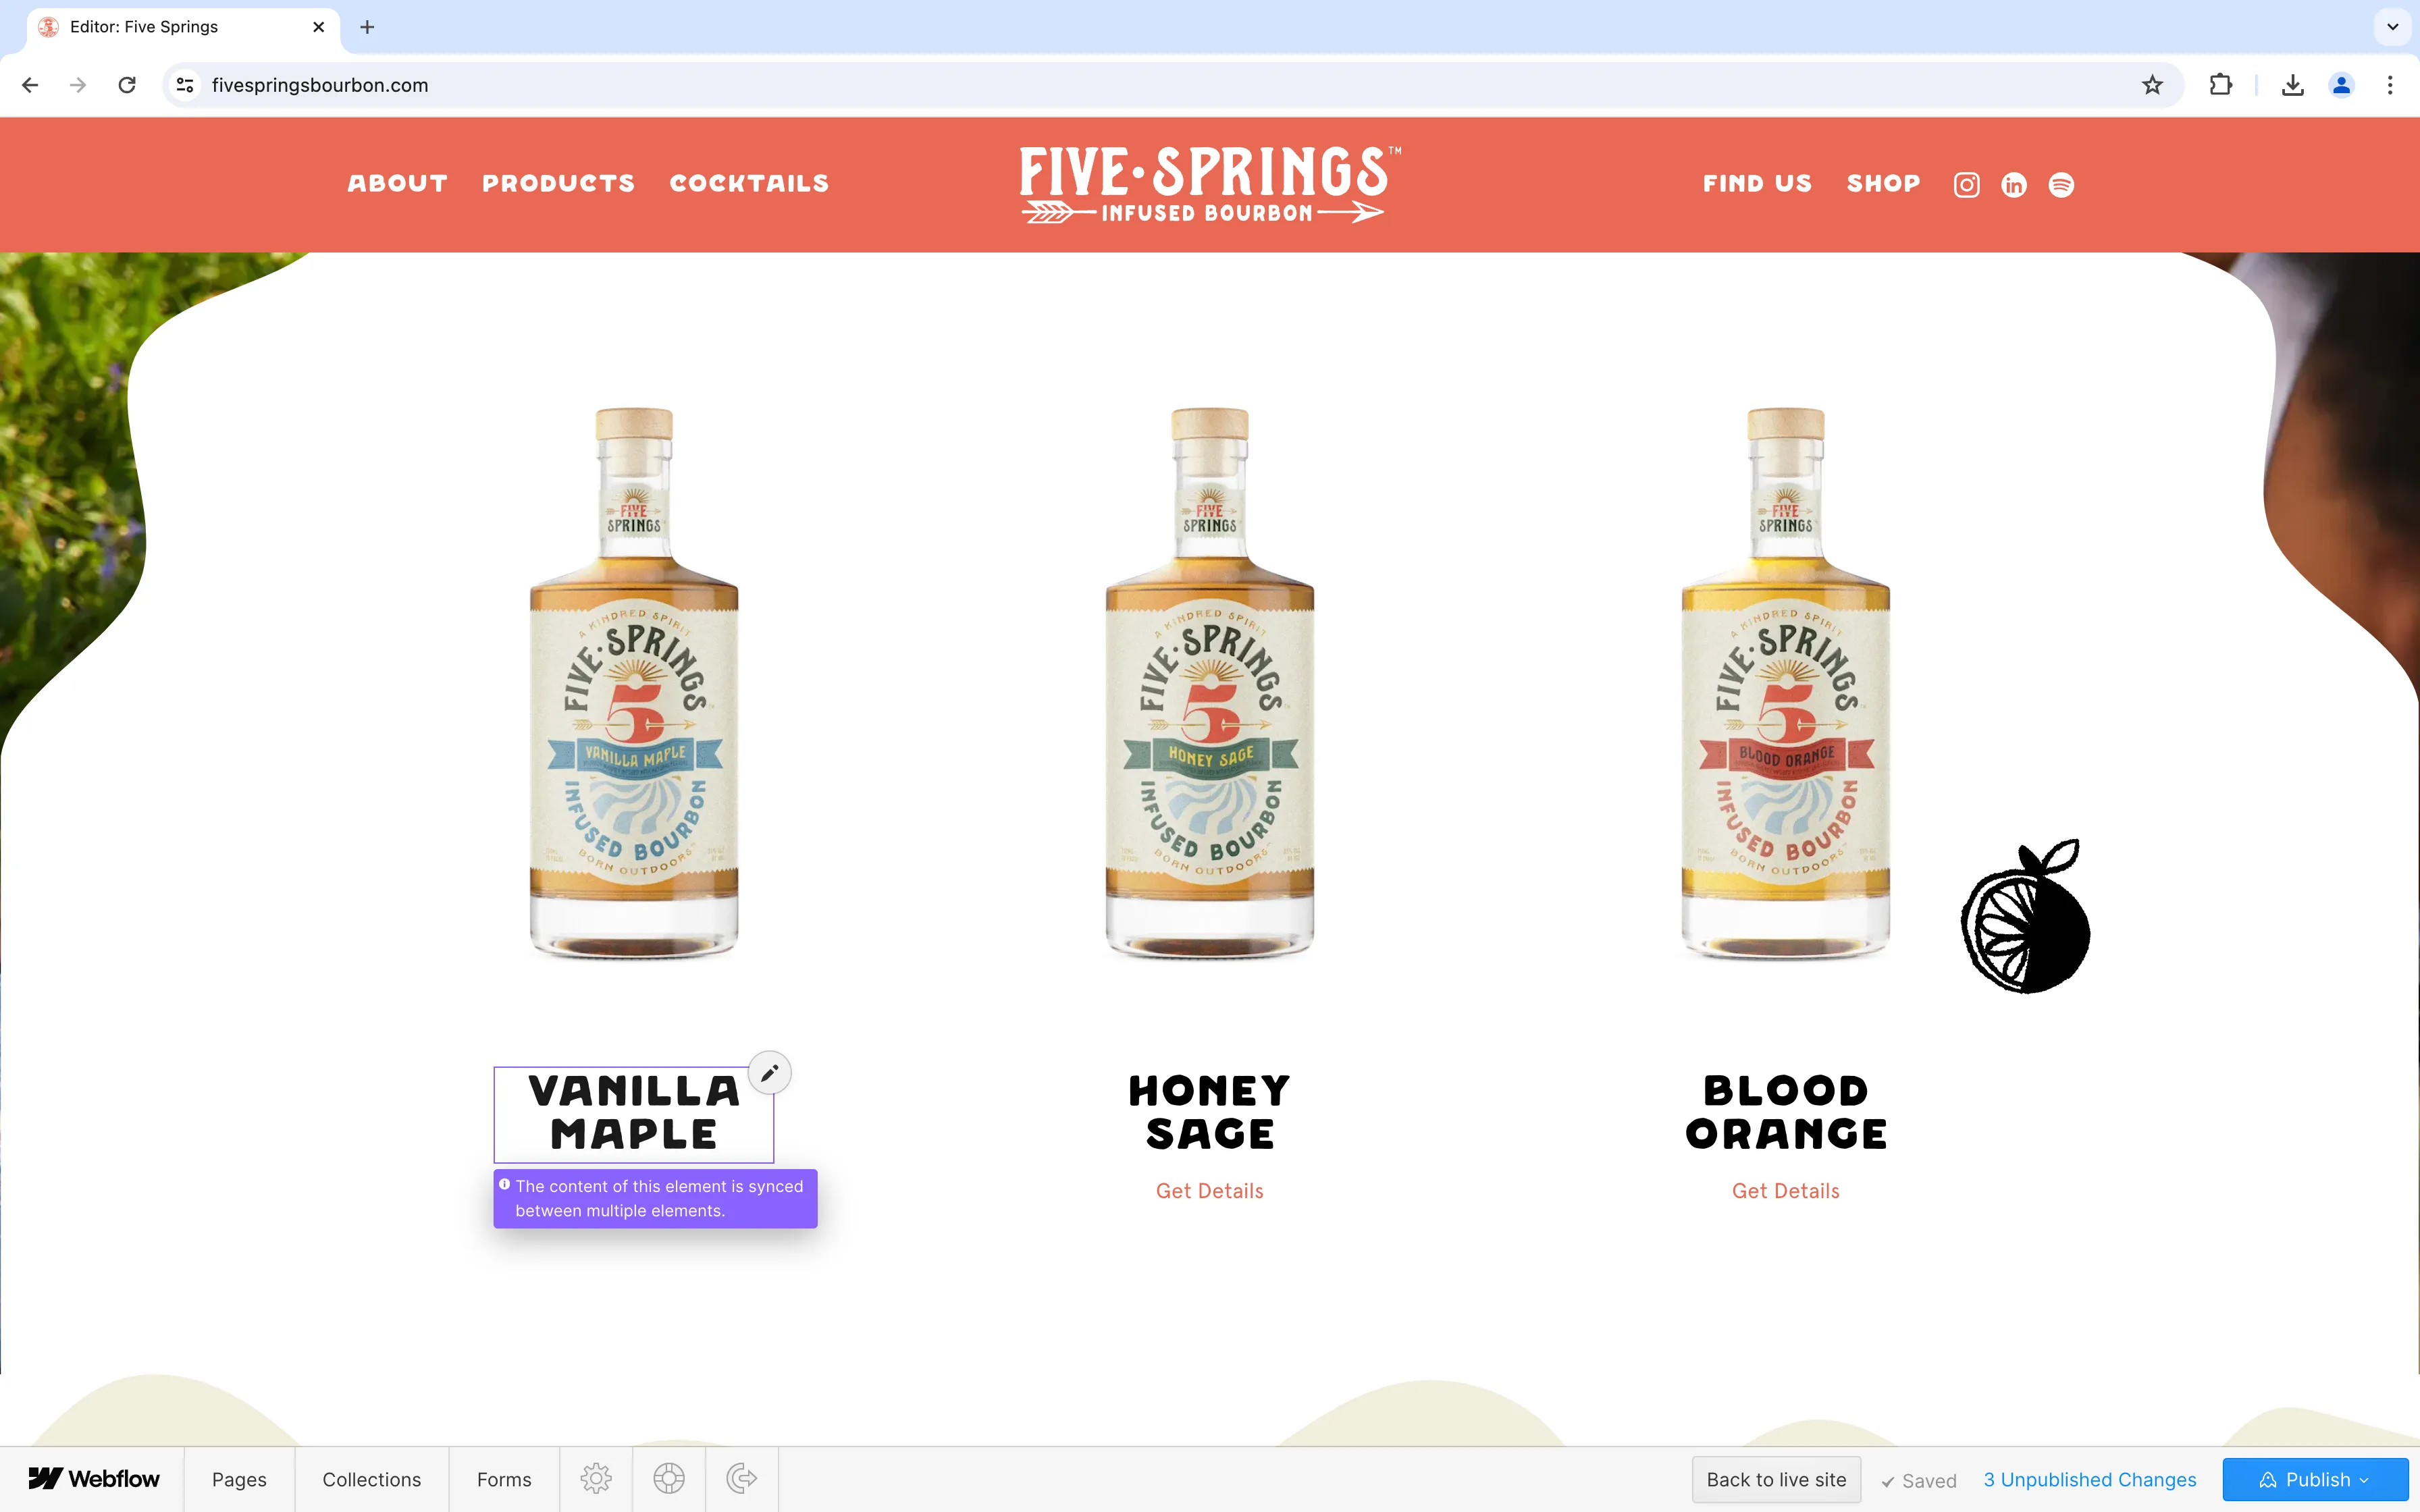
To manage or revise dynamic data, refer to the Editing Collections page.
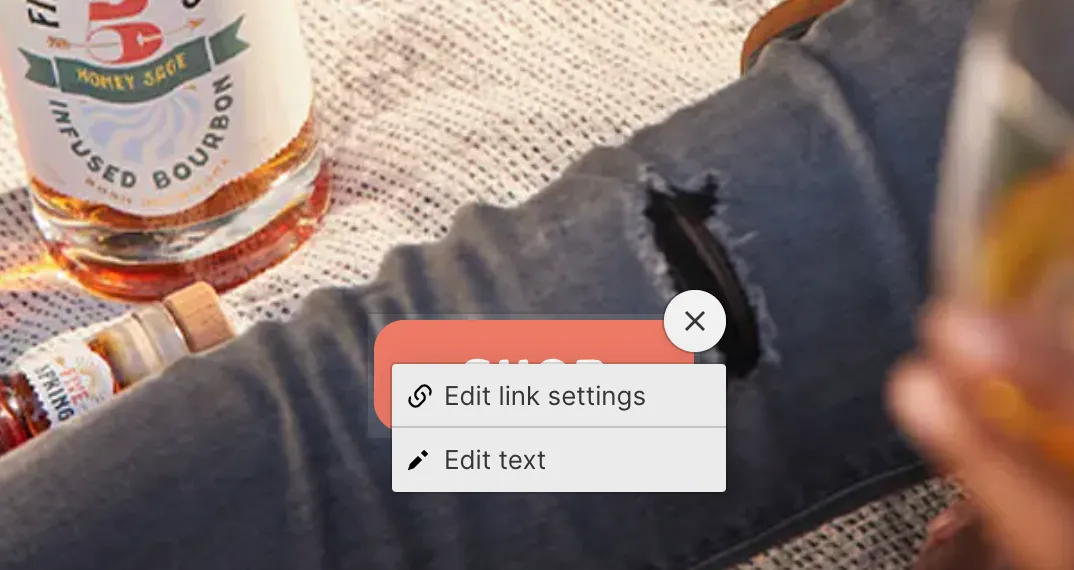
Editing buttons
To edit a button, hover your cursor over the element and click on the gear icon ⚙️ that appears in the upper right.

You’ll see two options:
-
Edit link settings - update the target url of the button
-
Edit text - update the text displayed in the button
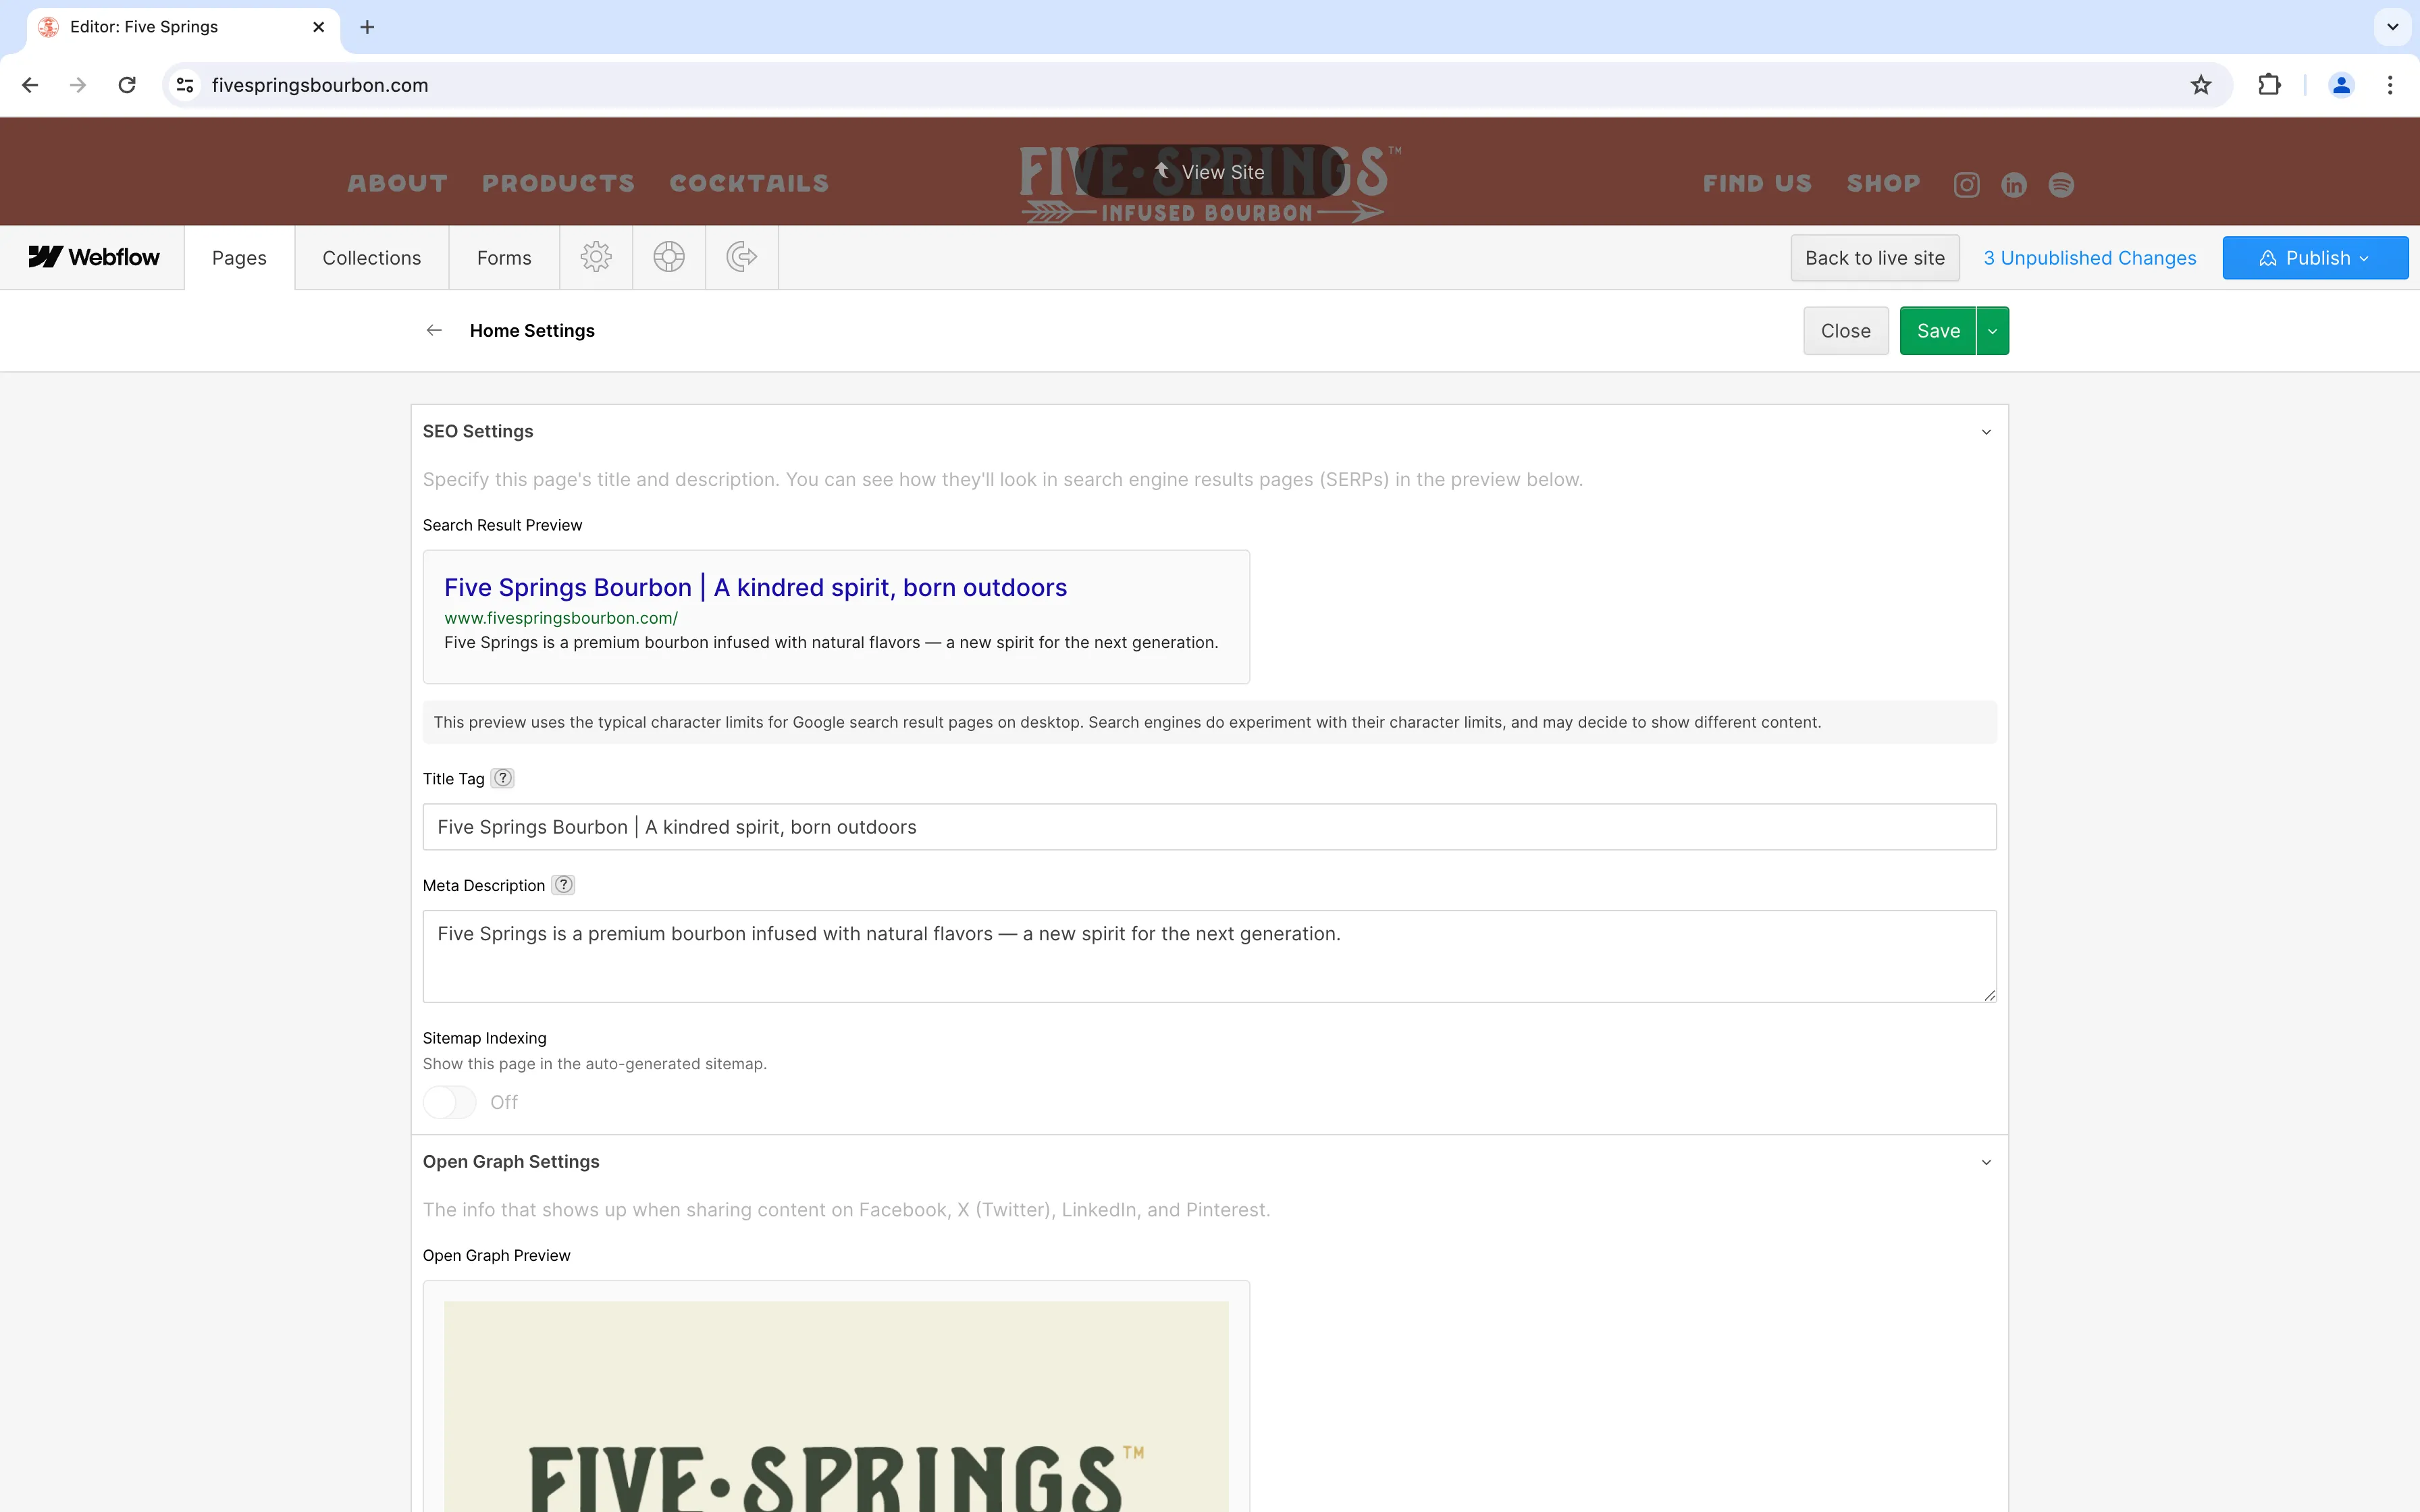
SEO settings
From the pages section, you can manage vital page settings like meta titles and descriptions, Open Graph titles and descriptions, and Open Graph images.
To manage page-specific SEO settings, navigate to the pages tab in the Editor menu.

Click the settings button to see available fields.